Tuesday, December 18, 2007

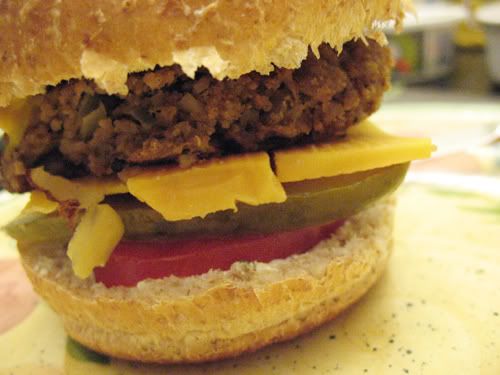
Homemade Veggie Burger

Lately one of my newest food blog obsessions is Everybody Likes Sandwiches. It's got great recipes and the pictures are so pretty to look at. As I was browsing through some past entries on said flog, I came across this recipe for Walnut Oat Burgers. I've been wanting to try a hand at making my own veggie burgers for a while now, and this recipe seemed like the perfect endeavor.


I'm happy to report that these burgers came out great. They were so so good I don't ever want to see a soy burger again in my life!
Photobucket

They are also much healthier then soy patties. Since a large ammount of the mix is made up of ground walnuts, and walnuts are one of the World's Healthiest Foods, I have no qualms to treating myself to a burger now.


And the recipe seems easy enough to follow too. I only say that it seems easy enough because for whatever reason, I had a few troubles following it this afternoon. I'm not sure why, but I mixed up the bread crumb measurement and I forgot to add milk. The bread crumb situation rectified itself easily enough, I just ended up scooping some out of the rest of the mixture. The lack of milk however, was most likely the reason for the tiniest problem I had with these burgers. As a few of them fell apart. They buckled from the pressure of me trying to flip them on the first go. However, the strong ones survived and they were happily devoured by me and my family members who were brave enough to try them.
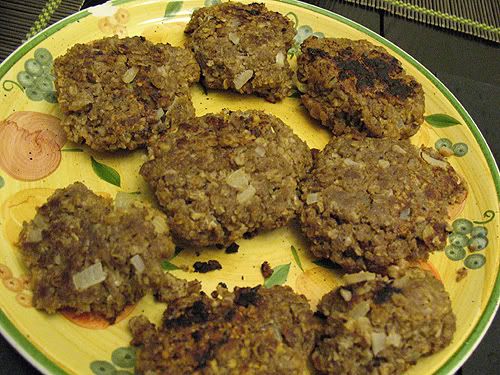
Photo Sharing and Video Hosting at Photobucket


The recipe:

Walnut Oat Burgers
(Courtesy of Everybody Likes Sandwiches

burger mixture:
2 cups walnut pieces
2 cups rolled oats
½ cup breadcrumbs
3 eggs, slightly beaten
½ cup skim milk
1 onion, chopped fine
3 cloves garlic, minced
1 tsp sage*
1 tsp salt
freshly ground black pepper to taste

for cooking burgers:
oil to brown patties
3 cups vegetable stock

1. Grind walnuts in blender and combine with the rest of the burger mixture ingredients. Let the mixture rest in refrigerator for about an hour to let the flavors meld together.

2. Form the mixture into patties. The entire mixture will make 8-12 burgers depending on the size patty formed. It is recommended to use half of the mixture now, and reserve the rest for use in another recipe or for more burgers later.

3. Brown patties on both sides in a lightly oiled skillet, then pour the stock into the skillet and bring to a boil. Reduce heat and simmer, covered, for 25 minutes. Serve on buns with all your burger fixings.


*I didn't have any sage on hand so I just used some ramdom herb and garlic seasoning I found in my pantry. They still tasted great.


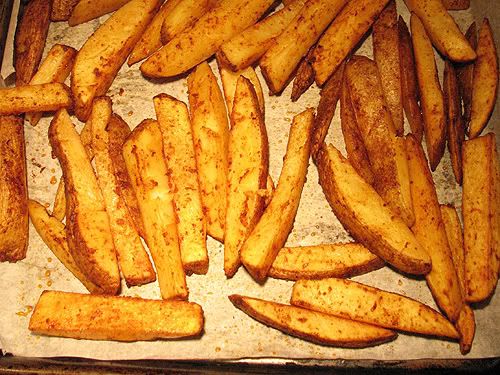
Now the perfect side to this dish? Home baked taco fries.
Photobucket

They are a tastier and healthier alternative to those gross fries out of a bag from the freezer. Also, they couldn't be easier to make. This recipe is just an approximate guess of what I did, as there is really no need to measure with something like this.

First preheat your oven to 375. Clean and chop 5 medium sized russet potatoes. Slice into small strips, or cut into wedges. Whatever thickness you desire will work. Once all potatoes have been cleaned and chopped, throw into a large bowl. Toss slices with a few tbsp of extra virgin olive oil, a tiny pinch of salt, and liberal shakes of chili powder and garlic powder. You can also use taco mix, but since there is a lot of added sodium with that I'd reccomend using your own spices.
Once all the pieces are coated, place them on a baking sheet lined with parchment paper. Cook them for about 30-40 mins, or until cooked and crispy.
Tuesday, November 13, 2007

Tofu Sandwiches

A while ago I saw a recipe for tofu sandwiches posted somewhere on livejournal, I think it might have been VeganCooking but I can't remember.
Anyhoo, after seeing this amazing sounding recipe it was on my mind grapes for about a month. So yesterday on my day off I decided to try out these marinated tofu sandwiches.

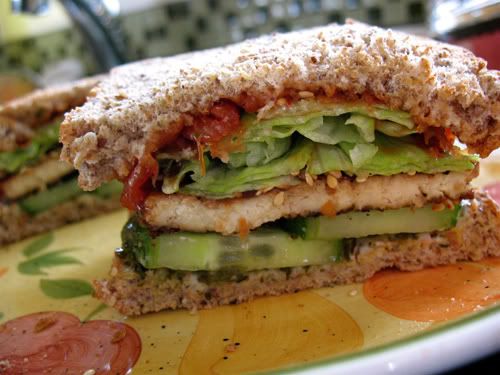
They are amazing! The tofu is so firm and flavorful. Both sweet, and spicy. It was such a nice treat from strictly veggie filled sandwiches. (Since I've never been a big fan of soy lunch meats.)

Photo Sharing and Video Hosting at Photobucket
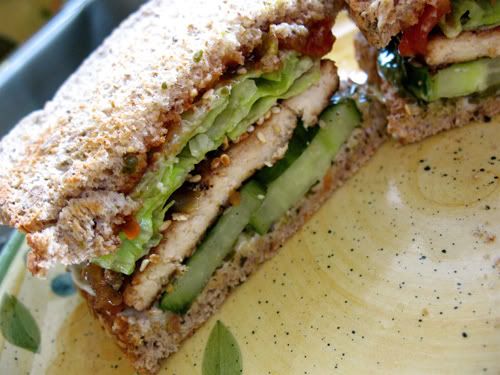
(And Is it just me or does that tofu kind of look like chicken? Oddly enough the texture also reminded me of chicken...)

The tofu is marinated in a combination of soy sauce, garlic, and spices. Then it gets coated in fresh black pepper, fried up, and then coated in sesame seeds. It is simply nothing short of a slice of tofu heaven. Even my tofobic sister enjoyed them!

Tomorrow I think I will try out the left over pieces in a spinach salad. Mmm.

The recipe is as follows:
(I didn't stick to the original since there were a few things I was missing-fresh ginger for one. But I think it still turned out pretty damn good.)

Pepper and Sesame-crusted Tofu Sandwiches
(From VeganCooking?)

Drain and press out any extra water from a block of firm or extra firm tofu.* Thinly slice the entire block and marinate for an hour or longer with the following marinade:


3/4 cup soy sauce
2-3 tsp rougly chopped fresh ginger, or if you don't have any, ground ginger will work just fine.
3-4 cloves of garlic, roughly chopped
1 1/2 tsp ground cumin
2 tsp ground coriander
1/2 tsp chili powder
1-2 tsp green curry paste
2 tsp sesame oil
freshly ground pepper
sesame seeds


Combine all the marinade ingredients in a large container and add tofu slices. Keep in the fridge for a minimum of one hour.

Once the tofu has marinated, heat a pan to medium high with a bit of oil in it. (I used a combination of 1 tsp sesame oil and some veg. oil.) While the pan is heating grind fresh black pepper onto a plate. Remove the tofu from the marinade, blot with a paper towel and cover both sides with the pepper. Do this with all the slices, then fry them in the pan-about 1-2 mins or until they are crispy and brown. In the meantime, cover a new plate with sesame seeds. Once the tofu slices are finished marinating, coat them with the sesame seeds.


Photo Sharing and Video Hosting at Photobucket

To serve these, I toasted 2 slices of whole grain flax bread. On one slice I put some light miracle whip and some cilantro. (All I had was the stuff in the tube, but keep in mind that fresh is obviously preferable!) And on the other slice I slathered some sweet red pepper salsa. I also added some thick slices of cucumbers and some crispy iceberg lettuce. Other good toppings would be bell peppers, onions, tomatoes, etc.

*In order to press out all the water from the tofu (to gain a firmer texture and stronger taste) my preffered method is as follows:
Place your block of tofu on a plate in between two paper towels. On top of the paper towel, place a large skillet. On top of the skillet, stick a dictionary or any heavy object. Leave it for about an hour or so and most of the water will have drained.

Friday, October 26, 2007

Orzo Salad

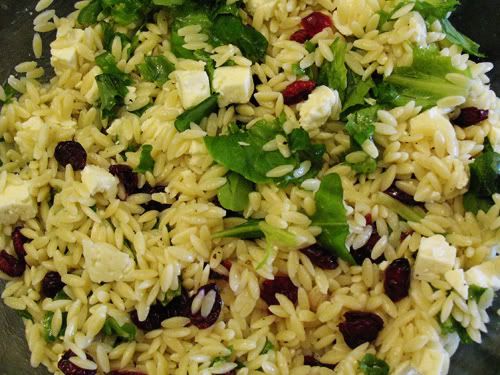
This summer I became obsessed with an orzo salad. It had spinach, lots of onions and garlic, feta cheese, and of course, orzo. It's a cold salad to be kept in the fridge, so it can sit and stew in it's own flavors. Like a good cheese, it only gets better with age. Also like (some) cheeses, it stinks. (Well, more like you stink, since there is about 6 cloves of garlic in the thing.) The consumption of garlic is always a battle with me. On the one hand it is tasty, and very good for you. On the other hand it doesn't leave you very fragrantly pleasing.
So to compromise I try to not consume to much garlic when I am around lots of people, like at work. This made me pretty sad since the salad I described above is one I could see myself eating every single day, and a great option to bring for lunch.


But now I have a solution! I was watching Everyday Italian a while back, and on the show Giada made a "Tri-Colore Orzo Salad". (Which translates to three colours.) It was very similar to my beloved (but garlicy) salad I yearned to enjoy on a regular basis, only without the garlic and onions and other things that wouldn't smell too great. I made a mental note to try this new salad out sometime, and that was that.


Then sometime last week as I was trying to scrounge something up for my lunch, I decide see about making this sald. Lucky enough I had orzo so I set to work. The result was wonderful.
I ended up improvising a bit since I didn't have the exact ingredients she used, and because I couldn't be bothered to look up the recipe to find out for sure wether I did or not. (Turns out I was pretty close.)

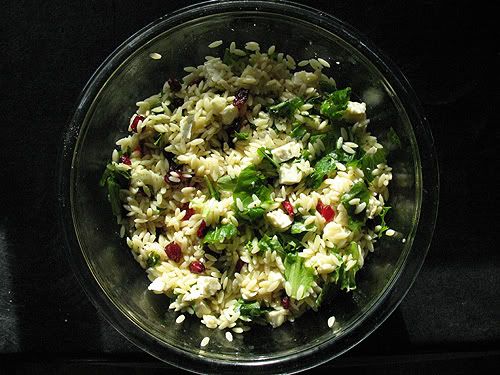
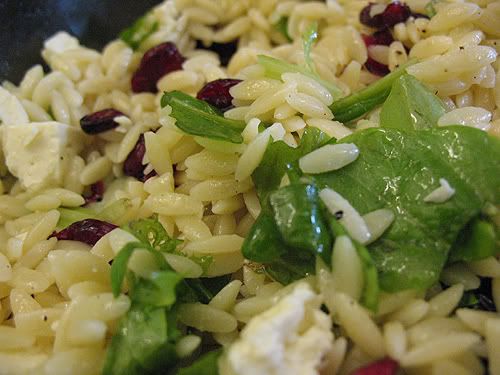
I'm also really proud of staying true to the "tri-colore" theme of the salad, by finding three colours to put in it:
Photo Sharing and Video Hosting at Photobucket


The recipe will be a rough idea of what I put in my salad, since I never keep track of exact measurements when cooking. I also made enough for my lunch as well as my parents who always have difficulty cooking for themselves after work. Keep in mind these measurements can easily be changed to suit how many mouths you intend on feeding. (This recipe fed about 4.)

Photo Sharing and Video Hosting at Photobucket

What you will need:
2 1/2 cups orzo, cooked al dente
1/2 cup baby spinach
1/2 cup baby arugula
1/2 cup of crasisns
1/4 cup of light feta cheese
1/4 cup of extra virgin olive oil, plus 3 tbsp
3 tbsp or juice of one lemon
zest of one lemon*
salt and pepper to taste

*I didn't have any lemon zest in this batch, since I still don't have zester, and I am completely hopeless to somehow accomplish another way to zest it up. (How do I even live like this?!) I'd highly recommend adding some though, because I imagine it is wonderful.


What to do:
Cook the orzo to package directions. Toss with 3 tbsp of extra virgin olive oil, and let cool. Meanwhile juice&zest the lemon, rip apart (or chop) the arugula and the spinach, and dice (or crumble) the feta cheese.
Toss the orzo with the rest of the extra virgin olive oil, lemon juice, lemon zest, spinach, arugula, crasins, and feta. Add a pinch of salt and a generous grind or two of fresh black pepper. Chill and serve.

Photo Sharing and Video Hosting at Photobucket


As I mentioned earlier in this post, this is the type of salad that gets better the longer it sits in the fridge.
Some other ideas to add to this would be some chopped peppers, green onions, and if you're brave, (or alone) a glove of garlic or two. (I mean one or two cloves wouldn't be that bad, right?) Next time I will try it.

Sunday, October 21, 2007

Lovely Lentils

After being a vegetarian for nearly five years, I had never had lentils until a few months ago. I had always thought about it, and I really did want to try lentils, but I was always too afraid to go for it. Eventually I did get around to consuming lentils when I found them in a canned lentil soup, which magically appeared in my pantry one day.
I quite enjoyed the soup, and made a vow to try and partake of more lentils in my diet. Until recently though, I had never found much reason to try them. Then I found this lentil chili recipe and it inspired me. I tired it out and was in love.

So ever since falling in love with lentils from that recipe, I have decided to try out more recipes with lentils.
Then as fate would have it, I recently caught an episode of Good Eats devoted entirely to lentils! I made a vow to try out at least one of the recipes.

As a part of my crusade to find healthy baked items, I decided to go for the Lentil Cookies. Now, when I first heard dear Alton utter lentils and cookies in the same sentence, I thought he was crazy. As much as I love him I could just not get behind this idea. Even after seeing him make them and devour them I still wasn't sold. Then, and I'm not sure when or why- but sometime this past week I found myself ready and willing to give them a try.

Photo Sharing and Video Hosting at Photobucket

They certainly are very appealing health wise. The recipe calls for whole wheat flour, dried fruit, oats, and (obviously) lentils. I also decided to personally up the nutrition in these babies by replacing the sugar with Splenda and adding some flax.

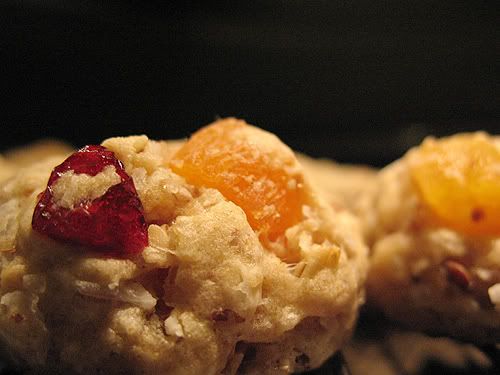
For my dried fruit I decided to use my two favorites, craisins, and dried apricots. They ended up being quite the pair.
Photo Sharing and Video Hosting at Photobucket


The only issue I have with these is that I'm not sure what to call them. On the one hand they are sweet like cookies, and they kind of remind me of an oatmeal cookie, so calling it a cookie makes sense.
On the other hand, they came out shaped like little biscuits, and are quite round and dense. Not like the traditional cookie.
Photo Sharing and Video Hosting at Photobucket
Also telling people I made lentil cookies usually results in them looking at me like I am crazy and shaking their head in disgust.

They also kind of remind me of these "cookies" that always pop up during christmas time. They're about the size of a quarter but very thick, kind of the same idea as these lentil cookies. They've got jam in the middle and walnuts all around the dough part. They are dry and bland and I've always found them useless. In my humble opinion, these lentil cookies are a million times better then the dry jam cookies of Christmas past, present, and future.


But in the end it doesn't really matter what they are called, what matters is that they are delicious, and that everyone should try them! (No matter how skeptical you may be.)

Lentil "Cookies"
(Courtesy of God Alton Brown)

2 cups whole-wheat pastry flour*
1 teaspoon baking powder
1 teaspoon salt
1 1/2 teaspoons ground cinnamon
1/2 teaspoon ground allspice**
I cup sugar***
3/4 cup unsalted butter, room temperature
1 egg
2 teaspoons vanilla extract
1 1/2 cups lentil puree, recipe follows
1 cup rolled oats
1 cup dried fruit
1 cup unsweetened dried shredded coconut
2 tbsp ground flax seed

*I am just realizing now that I did not use pastry flour, but regular whole wheat flour. They still turned out though.
**I didn't have any allspice, so I substituted this for ground cloves.
***As I mentioned above, I replaced the sugar with Splenda.


Preheat the oven to 375 degrees F.

In a medium bowl, combine the flour, baking powder, salt, cinnamon and allspice (or cloves).

In the bowl of a stand-mixer with a whisk attachment, cream together the sugar and butter on medium speed. Add the egg and mix until just incorporated. Add the vanilla and lentil puree and mix until combined. Add the flour mixture and blend on low speed until just combined. Remove the bowl from the mixer and stir in the oats, dried fruit, coconut and ground flax seed.

Form the dough into balls about 2 teaspoons in size and place on a baking sheet with parchment paper, leaving about 1-inch of room in between. Bake for 15 to 17 minutes, or until an internal temperature of 195 degrees F is reached on an instant-read thermometer.

Lentil Puree:
4 ounces lentils, approximately 2/3 cup, picked over and rinsed
2 cups water
In a small pot over medium heat, combine the lentils and the water. Bring to a simmer, cover, and simmer for 30 to 40 minutes, or until lentils are tender. Remove from the heat and puree. If using immediately, let cool. The puree may be stored in the refrigerator for 3 to 4 days or in the freezer for 2 to 3 months.
Yield: 1 1/2 cups lentil puree

Wednesday, October 3, 2007

Berry Good Cream Cheese Muffins

A while back I caught an episode of Eat, Shrink and Be Merry on the food network. To me it's one of those shows that sounds really good in theory, but it always comes up short when I watch it. I think the reason for not fully embracing this show could be the dynamic between the two sisters. The blonde one is very bossy and controlling in the kitchen. She always seems annoyed and pissed off at the other sister. This reminds me a little too much of the dynamic in my own kitchen, between my younger sister and I. (My sister being the bossy mean controlling one.) It's not that fun to live, and it's not that fun to watch.

But despite my psychological issues, I still try to tune in every now and then for a new healthy recipe to try out. The latest episode I saw was titled: "Little Miss Muffin Tops". The recipe sounded easy and really good. Lately i've been trying to only bake healthy things, and these fit the bill perfectly. So I decided to try these out. But since mid-episode I got distracted by 90210, I missed the part about how they go about baking only the tops. So when I made these I decided to go all out and just make full on muffins.

Photo Sharing and Video Hosting at Photobucket

Since I'm always a bit apprehensive to change a baking recipe, I followed this one almost perfectly. I felt confident in my idea this time though, since all it involved was adding some flax. Ever since I bought a big bag of flax seed a while back, I try to add it to as many recipes as possible. I also upped the ratio of raspberries to blueberries since I had a small selection of decent blueberries to work with.


"Little Miss Muffin Tops"
(Courtesy of the food network.)
Ingredients:

Dry ingredients
1 1/4 cups all-purpose flour
3/4 cup whole wheat flour
1 1/2 teaspoons baking powder
1 tsp baking soda
1/2 tsp salt
1 tbsp ground flax seed


Wet ingredients
1 cup low-fat vanilla flavoured yogurt
1/2 cup lightly packed brown sugar
1/4 cup vegetable oil
1 x egg
Grated zest of one large lemon
2 Tbsps freshly squeezed lemon juice
2/3 cup fresh blueberries
2/3 cup fresh raspberries
12 teaspoons light strawberry cream cheese (Philadelphia brand)

Directions:
Dry ingredients
Preheat oven to 375°F. Spray 2 muffin-top pans lightly with cooking spray and set aside.
Combine dry ingredients in a large bowl.
Wet ingredients
Whisk together wet ingredients in a medium bowl. Add wet ingredients to dry ingredients and mix just until dry ingredients are moistened. Fold in blueberries and raspberries.
Divide batter evenly among 12 muffin-top cups. Hide 1 tsp cream cheese in the centre of each muffin. Bake for about 12 minutes, or until muffin tops are puffed up and a toothpick inserted in centre comes out clean. Remove from pans and cool on a wire rack. Serve warm.

Photo Sharing and Video Hosting at Photobucket

I am very happy to report that these turned out great. The only thing missing was more of a lemon flavor, which was lacking since I omitted the zest. (As I have no method to zest a lemon.) I'd also like to try these again but with a bit more whole wheat flour and less regular flour. I found myself wanting them to taste more grainy, and I think more whole wheat could fix that.

Monday, September 24, 2007

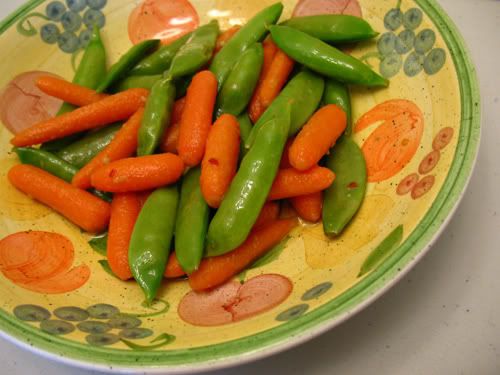
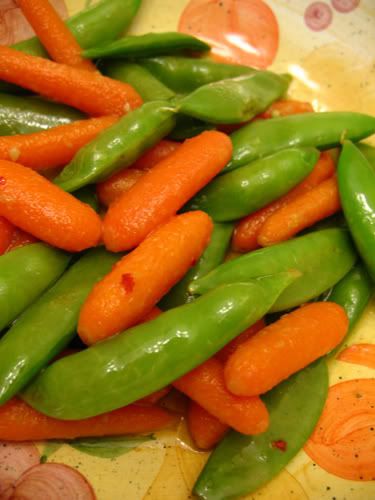
Peas and Carrots

Last night as I was making dinner, I was faced with the usual problem that always greets me when I open the fridge. A lack of vegetables. As a vegetarian who is trying to eat healthy, a lack of vegetables can be very disheartening. Usually when this happens I give in to a box of macaroni or other pasta, and declare defeat. But last night I was determined, so I took the only two veggies I had in my fridge. Sugar snap peas and baby carrots. And while the idea of peas and carrots may seem boring and bland to some, I assure you the flavor is anything but.
In fact, I loved it so much that when I got home from work today I decided to make it again, with a few modifications. I used butter to make it the first night, but I went for some good ol' E.V.O.O. this time around. I liked it a lot better using the oil, since using butter made it taste too...buttery. (I wonder why?) And I'm not the biggest fan of butter.

The recipe is based off of one found in "The Essential Vegetarian Cookbook".


Spiced Up Peas and Carrots

Photo Sharing and Video Hosting at Photobucket

What you will need:
4 tbsp Extra Virgin Olive Oil, or butter
3 tbsp Lime Juice
1 clove Garlic
1/2 tsp Red Chili Flakes
1/2 tsp Brown Sugar
1/2 cup Baby Carrots
1/2 cup Snap Peas
salt and pepper to taste

Please note that the ingredients are all a rough measure of what actually goes in there. I tend not to measure things when cooking (why create more dishes?), so use your judgement if something looks off.

First heat up your butter or oil in a pan on medium heat. Add the garlic, and let simmer for a bit. Then add the lime juice, and the brown sugar. Let sit until all the sugar is dissolved. Once it forms a kind of sauce, add the snap peas and baby carrots.* Let this all simmer together for a few minutes, until the veggies are slightly cooked, but still have a good crunch. Then toss them with the red chili flakes. The chili flakes sure add spice, so only add them if you like heat.


Photo Sharing and Video Hosting at Photobucket


-The recipe also called for lime zest, but seeing as I wasn't using a fresh lime I had none to add.
-Don't have a lime or any lime juice? A lemon will work fine.


*For the carrots, you can leave them whole or cut them in half, lengthwise. Doing so will make them cook faster.
If you are lazy like me, you can just leave the carrots as is and add them to the pan first, let them cook a bit, then add the peas after 1-2 min.

Wednesday, September 12, 2007

Salad!

Even though I just started this blog, I probably won't be posting very often for a while. While I have been cooking a lot lately, (I recently baked some pumpkin loaf, and i've got homemade cauliflower soup on the menu for tonight.) I won't be posting about these endeavors just yet. For I'm currently without a digital camera, since my current one is broken beyond repair. I'm working on getting a new one, but that hasn't happened quite yet. I'm not going to wait any longer to post though. I've got to break in this blog!

So here it goes. I've got a great salad here that was made during the summer. I was quite delighted with this one and decided to take pictures just for the heck of it, which works out great for my lack of camera/new food blog situation.
Forgive the inaccuracy of this recipe, as it was made some time ago. And I can't totally remember what was in this...


Blackberry Spinach Salad
Photo Sharing and Video Hosting at Photobucket
For this I tossed some baby spinach, blackberries, walnuts, and some chopped green onions with a honey mustard vinaigrette. Here's a rough idea of what went in there:

1/4 cup Extra-Virgin Olive Oil
1/8 cup of white wine vinegar
1 tbsp mustard (It might've been dijon?)
1 tbsp of honey
salt and pepper

And while I own a whisk, and many forks which can be used to emulsify a vinaigrette just fine, I prefer a different method. I stuck all the ingredients in a magic bullet, popped on the flat blade and blended it for a few seconds. It's a highly preferable method when you are as impatient as I am.

So that's that. Enjoy!

Monday, September 3, 2007

willkommen!

Welcome to my food blog! This blog (or flog, as I like to call it) was started as a way for me to share one of my greatest passions in life: cooking. I've been a vegetarian for about 4 years, and until recently never gave cooking much of an effort. On the occasion i'd try something fancy, but I never really got too crazy about it. It was always something I thought about doing, but never acted on. Over the past year i've cultivated a real interest and just a speck of talent in this area, and I hope to share my enthusiasm and (little) knowledge with others. I'm addicted to the food network, and get most of my inspiration from my favorite shows. (Everyday Italian being #1.)
I hope you all enjoy this flog! (As much as I hope that someone might actually read this...)