Tuesday, November 4, 2008

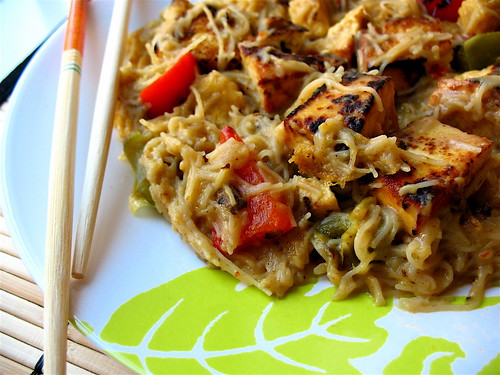
In a Hurry Coconut Curry

Oh, how I love when things rhyme!
But what I love even more is fast, tasty meals. I have been crazy busy these past few months (hence the lack of posts...)so I have been focusing even more on food that doesn't take a lot of effort in order to properly feed myself.
This one fits the bill perfectly. All you need is a block of tofu, some veg, a can of coconut milk, and curry paste. Combine them all in a pan for about 10 mins and you've got a yummy curry that took little to no time or effort. My kind of meal!

IMG_4889
Green Coconut Curry

1 can of coconut milk
1/2 brick of extra firm tofu
1/2 red bell pepper, diced
1/2 green bell pepper, diced
1/4 can of baby corn, rinsed
1-2 tsp of oil
3-6 tbsp green curry paste (depending on your taste)
red chili flakes (optional)

First rinse the tofu, and pat dry. Try to drain out as much liquid as you can with a paper towel without crushing the tofu to bits. Cut into cubes. Heat up the oil in a pan, and add tofu when pan is heated. Fry all sides for about a minuete or so, until golden brown. Next add the can of coconut milk and a few tablespoons of curry paste.* Cover and lower heat to medium. After about 5 mins add the sliced peppers and baby corn (or whatever vegetables are on hand) and cook another 5 mins or so, until the coconut milk has reduced to nothing.

Serve over rice if you have time, or rice noodles if you don't. Garnish with red chili flakes, soy sauce, hot sauce, or whatever your heart desires.


*I like to numb my mouth with spice and flavor, so I'm not sure what to suggest here for the average person. I say just add a tablespoon or two at the start then taste as you go. If you want more curry flavor, add a few more scoops.

Monday, July 21, 2008

Summer Salad

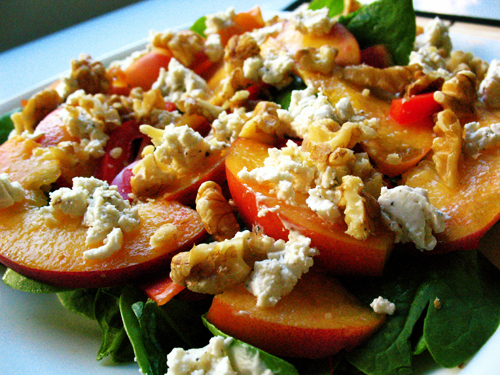
peach plate

Last week I noticed some peaches at the market. Not thinking much other then "a peach would be nice" I bought myself two blushed beauties and thought that was that. The following day of the peach purchase, I decided to bake one of the two in a batch of muffins. But as I was cutting up the first peach, I couldn't help but pop a slice of it in my mouth. It just looked so juicy, so colourful, so appetizing. After the first slice, there went another, and another-until before I knew it the peach had vanished. Now I'm not sure if it's because I hadn't had a fresh peach since last summer, or if It was just a damn good peach, but I felt it was the best peach I had ever had. The experience was euphoric.

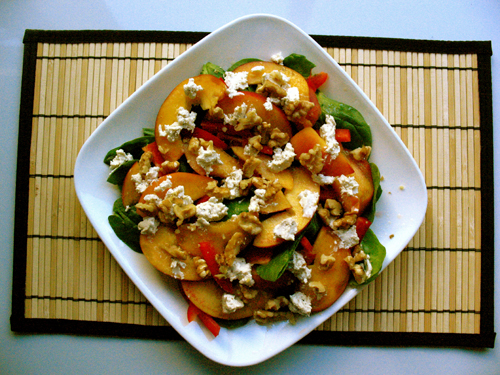
So today as I was passing by the same market, I felt the need to buy myself some pretty peaches again. Fate was smiling down upon me because while I found some beautiful looking peaches, an inspiration for what to do with them also hit. I acted on my instincts, grabbing a pack of baby spinach and some peppered goat cheese, then walked back to my apartment and set to work on a spinach salad. It's another hot hot day in Vancouver, which made this salad oh-so appropriate for tonights dinner. With the addition of only a few minor ingredients, this was a truly tasty salad.

peach salad


Peach Perfection on a Plate

few handfuls of baby spinach
1/2 red pepper, thinly sliced
1 fresh peach, sliced
crumbled goat cheese (i used pepper infused goat cheese, herbed or plain would also work)
2-3 tbsp olive oil
1-2 tbsp raspberry white wine vinegar
dash of salt & pepper
1/4 cup crumbled walnuts

Place the spinach on a plate. Mix the olive oil with vinegar, salt and pepper, and whisk until incorporated. Drizzle spinach with dressing. Slice the pepper, and peach, then lay atop the spinach. Top with crumbled goat cheese (flavored if desired) and crumbled walnuts.

Wednesday, July 9, 2008

Saute'd Soy'd Asparagus

After my first trip to Granville Island, I was sitting pretty with a beautiful bounty of affordable, fresh, quality fruit and veg. One of my favorite things I got was kale. It was a new green that I had always read about but had never tried. (couldn't ever find it back home!) I really loved the soup I made using Kale from that trip, but I also really enjoyed it in this simple and tasty dish when I added it to asparagus. I had never bought kale prior to moving here, but it seems to be a usual at the farmers market, and I plan on taking advantage of it's accessibility from now on.

I also struck gold with the asparagus there that first day. It was pencil thin and beautiful. The best part was that it tasted even better than it looked! Vancouver has been stuck in a heat wave since my arrival, deeming it too hot to turn on my oven, so I opted to enjoy my asparagus in a new method-pan frying.

almond asparagus kale

This recipe is almost too simple, and extremely versatile. Expieriment with whatever you like, or have on hand.

Almond and soy Asparagus with Kale

1/2 bunch asparagus
1/2 head of kale
1/3 cup natural almonds
2 tsp oil
3-5 tbsp soy sauce
1 clove of garlic
2 tsp red chili flakes

Take the asparagus and wash well. Trim the ends and chop into one inch pieces. Heat up a small pan with oil and add the garlic. Let saute' for about a min. Add the asparagus and soy sauce. Stir over medium high heat until asparagus starts to cook. Roughly chop the almonds and add them to the pan. Tear up your washed kale and throw it in there. Allow to sit for about a minuete or so. Just until the kale starts to soften a bit, but not so long that the asparagus gets over cooked. Sprinkle with some chili flakes if spicyness is desired.


Since I haven't built up a pantry for myself quite yet I didn't get to add everything I would've liked to this dish. Had I had it on hand, I would've tossed in some fresh ginger, sesame oil, and a sprinkling of sesame seeds.

Monday, June 30, 2008

Apartment Soup v.1

First some exciting news:
I have moved to Vancouver! Woo-hoo! I have always had an admiration for this city, and I am so happy to finally be living here! I love it so much, except for one factor.
The heat.

I've been here a little over a week and every day it has been sunny, hot, and muggy. Not at all what I expected from a city in the pacific northwest that is known for rain and overcast skies! I love the rain, and have been very sad that I have not had any to enjoy. There has only been one overcast day so far, and it only sprinkled then.

But through all this heat I am craving one thing and one thing only. SOUP! Why? My only guess is that maybe I am trying to make my new apartment and my new city feel "homey" and I guess soup does that for me? I don't know any other reason why making soup in almost 30 degree weather seems like a good idea.


But alas, since I moved in a little over a week ago, all I could think of was making a big pot of lentil soup. It's just something I had to do. So on my first (and so far, only) overcast rainy day last week, I decided to take a walk to Granville Island to check out the farmers market. I ended up with a pretty bounty of fresh and cheap vegetables, all begging to be put in a soup.

So with a combonation of farmers market loot, and some kitchen staples I bought at a swanky Save-On downtown, my first Apartment Soup was born.

mmm, soup


My biggest problem with making this soup was only one thing-I have no blender! As I was doing my apartment shopping back in Alberta, I kept telling myself I have no need for a blender. I told myself, "It's just so big and bulky, and all i'd need it for is to make smoothies, which I can do much easier in my Magic Bullet." Of course the one thing that a blender is good for that a bullet isn't would be BLENDING SOUPS. I stupidly realized this when I really wanted this soup blended, and so in a haze of hunger and impatience did a few quick blitz of the soup serving by serving in my magic bullet. It was a bit scary, since the bullet is plastic and I had hot soup in a little container. But all turned out fine. There were a few remaining chunks as seen in the picture, but that's okay since it adds more of a rustic feel.
The point of all this is that if you have a blender, feel free to chop the peppers and veg to any size you like. If you are like me and are sans-blender, I'd reccomend chopping them very small, unless you like big chunks in your soup.


Red Lentil, Pepper, and Kale soup.

1/2 yellow onion, chopped
1 large red pepper, chopped
1 small yellow pepper, chopped
2 tbsp extra virgin olive oil
1 tbsp curry power
1 tsp paprika
a few generous cracks of black pepper
1 tsp salt
16 oz can of chopped tomatoes, with juice
1 cup of water
1 1/2 cups red lentils
1/2 bunch of kale (no idea how to measure this really, just throw in a few handfuls.)
hot sauce (optional)

Finely chop the onion and add to a medium sized pot with the olive oil. After the onions begin to soften*, add the salt, pepper and spices. After about a min, add the red and yellow peppers and a little more olive oil if needed. Add the canned tomatoes, water, and lentils. Cover over medium heat about 20 mins, or until lentils are ready. Chop up the kale, and throw into the soup during the last few mins. Blend if desired. For added heat, add a few squirts of hot sauce.

I have made this soup similar to this in the past with all different sorts of veggies added-carrots, zucchini, mushrooms, etc. Feel free to play around with what goes in here.

*A lot of lentil soup recipes advise to put a tbsp or so of tomato paste in this step. I would be all for it if i could get my hands on tomato paste in a tube. But since I cannot, and I have no other use for a can of tomato paste, I omit this step.
Thursday, June 12, 2008

Granola "Muffins"

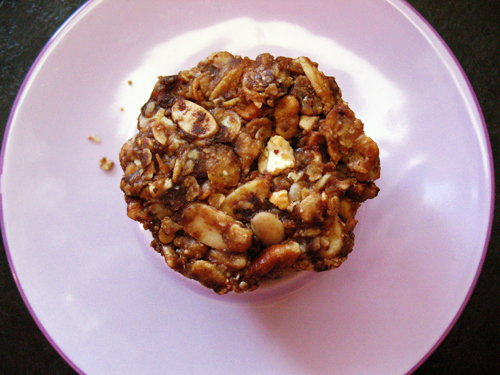
granola muffin

For some time now, I've been on a quest for a healthy homemade granola bar. For the past few years I've relied on store bought granola bars for a quick breakfast option I could eat on the go. But as I've grown more health conscious , I've grown to realize that most of these conveinent bars are not a healthy choice. A while ago I tried a recipe for baked granola bars, using peanut butter and egg white as a binder. The bars ended up tasting fine, but they didn't have the chewy texture I was looking for like the store bought bars.

I gave up on the quest for some time until finding this 'power bar' recipe at 101 Cookbooks. This post set a whirl of frenzy in the ol' mind grapes. These power bars sounded exactly like what I had been dreaming of making all this time!
So I set to work immedietly on my own version. I based it all on what I had kicking around the kitchen, so It ended up being a fruit version-using peanut butter and blueberry syrup as the base, with mixed nuts, coconut, raisins, dried cranberries, and apricots. I liked them fine enough, but I knew there was a better version waiting to be discovered.

This version is what I like to call "Healthy Decadance" Yes there is peanut butter, but it's organic natual peanut butter, with no added sugar or salt. It's got plenty of protein from all the nuts used, and I've snuck in some healthy ingridents that don't effect the taste negetively. I even let myself use (dark) chocolate chips! (because dark chocolate is good for you!)

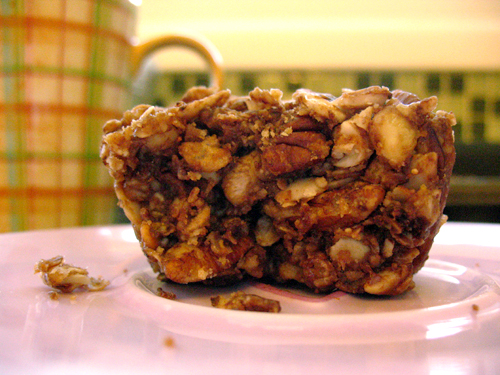
One thing that most excites me about this recipe is the muffin shape they recieved. This idea occurred out of pure laziness, when I found that our only decent size square pan was dirty, and I was in no mood to clean it. I instead decided to form these in a muffin tin. Taking away an extra dish to wash and making even more convienient sized granola bars? Yes please!

granola muffin

But since I hate dishes and won't dirty a dish unless I need it-that includes measuring cups! I didn't measure any of these ingredients. The following is just an approximation of what I used.

Granola "Muffins"

1/2 cup rice cereal (I used Special K)
1/2 cup oats
2 cups of nuts, roasted (whatever variety you desire!)
1/4 cup shredded unsweetened coconut
2 tbsp flax meal
2 tbsp wheat germ
1/4 cup dark chocolate chips

1-1 1/2 cup natural peanut butter (smooth and chunky both work, I prefer chunky)
1/4-1/2 cup maple syrup
1 tbsp honey
1/4 tsp salt
1 tsp vanilla extract (coconut or almond would also work)
1 tsp cinnamon
1 tbsp espresso powder

Preheat oven to 350. Scatter the nuts and coconut on a flat pan, and roast until the nuts are slightly browned and the coconut is golden. About 5-7 mins. Stir once half way through. Keep an eye on them, make sure they don't burn!
While the nuts are roasting, combine the rice cereal, oats, flax, wheat germ, and chocolate chips. Once the nuts have cooled a bit, add to the oat/cereal mixture.
While the nuts are cooling, combine PB, syrup, and honey until fluid. Add the salt, extract, cinnamon, espresso, and mix well.
Add the saucy mixture to the rest of the ingredients, mixing well. Using a spoon, place a small ammount of the mixture in a greased muffin tin. Spritz your hands with some pam, or roll around some butter and press down firmly on each muffin. Let cool to room temp.


The possibilities here are really endless. Try playing around with different flavored syrups, nut combinations, or even cereals. It's an easy recipe to adapt to the ingredients you have on hand and like!

Tuesday, May 20, 2008

Falafel Salad

So I really suck at this food blog thing. Lately i've either been too busy to cook, to lazy to cook something special, or too hungry to take a picture of what I make.

That isn't the case today though! I made a really easy and tasty falafel salad.

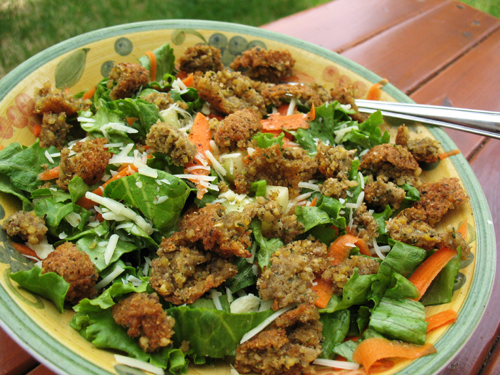
Photobucket

Since were running low on groceries, this is another one of those dishes that is made in hunger and desperation, using the only edible (and vegetarian) things on hand. I find these situations almost always to yield one of two results: either I come up with something tasty and delicious that I might not have thought of otherwise, or I microwave a frozen dinner. Luckily the first scenario is what went down today.


I knew I had some frozen falafel in my freezer, so I decided to do something with those. And since I didn't have any pitas, I decided to throw them in a salad.

I won't bother with a recipe, since all this salad took was some chopped lettuce, cucumber, green onions, and carrot ribbons tossed in a lemon vinegarete with some grated parmesan and falafel crumbled on top. Now doesn't that sound easy? I suggest giving this a try. Putting the falafel atop the greens was a great way to turn a side salad into a more substantial meal.

Monday, April 7, 2008

My first bento!

Photobucket
For a long time now i've been a fan of Vegan Lunch Box. It's actually one of the food blogs that inspired me to start my own. Even though I discovered it near the end of it's run, I still like to browse the archives for some lunch ideas. Ever since my discovery of that site i've longed for my very own laptop lunch box that is featured with every lunch. It's such a great way to cut down on plastic bags and bulky tupperware. But do I have one? No. Here is where the story gets a bit silly. Even though there is a retailer near me that sells the very lunch box, I never am in that part of town so I still have not got my hands on it. What's silly is that I do have other bento lunch boxes that I just ordered from J-List. Kind of odd how items from Japan are more convenient to buy then ones right in my own city!


Anyways, onto the bento!

Photobucket
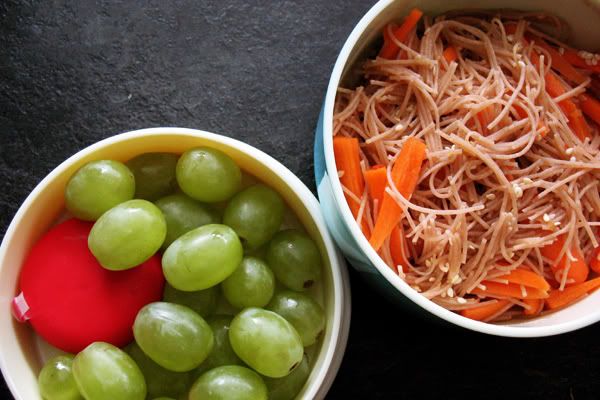
This is the cute little panda box I used to pack todays lunch. It's got two tiers that fit inside.
I received these cute little boxes in the mail last week while I was out of town, and today was finally the right day to break one in. The food featured is nothing real special, since I haven't had a chance to go grocery shopping since my return. (I had to work all weekend-bleh!) And all my family knows how to buy is white bread, milk, and lunch meat. (Ew.)

Photobucket

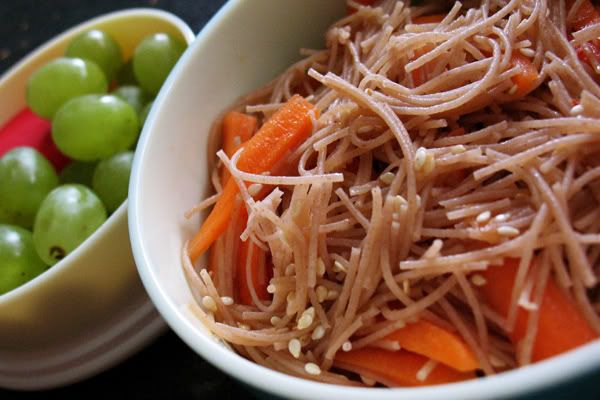
Since grapes and baby cheese is pretty basic, i'll share how I spiced up these carrots and asian brown rice vermicelli noodles. It's also quite basic, but they're pretty tasty! Making these is even too easy for a real recipe.

All you need to do is toss together the following:
Brown Rice Vermicelli noodles, cooked
baby carrots, julienned
sesame seeds

now add a few flavors to taste:
soy sauce
sesme oil
rice or red wine vinegar
red chili flakes

I usually add more vinegar than soy sauce since I like things with a bite, then just a little bit of sesame oil to add some sweetness. These levels can be adjusted to personal preference.

Since carrots were the only veggie I had in my fridge (really, I'm not exaggerating!) that's all I added. In the past I've also tried this same recipe with green or red onions, peppers, and peas. Black beans are also a nice addition to this, but I was running low on time as I was making this before work today.


More bentos to come!

Monday, March 17, 2008

Hope of Spring Salad

This past Saturday morning I woke up to a shock. When I got upstairs to fix my breakfast, there was a bounty of vegetables on my kitchen table! Since this is a rare sight in my house unless i've been shopping I began to wonder if somehow I had gone sleep grocery shopping the past night. I figured out what really happened though when my dad came into the room and got all excited about the vegetables before me. He then informed me that this bounty was all from the farmers market. Wait, the farmers market? In March? With a foot of snow on the ground? Blasphemy!

As pathetic as it is, my almost 19 year old self had never realized that the market is open in the colder months. Growing up the sporadic visits to the market my parents took me on were always in the summer, so I guess my sub-concious always figured that since I only went in the summer, that the market was only open in the summer. Nope. Turns out my parents are just a bunch of sissies who don't like buying good produce if it requires going out in the cold. I guess my dad was just feeling brave this past Saturday, which I am grateful for as these veggies were wonderful. I didn't snap a picture, but included in the bounty was: butter leaf lettuce, green beans, baby potatoes, tomatoes, and cucumbers. All organic too!

So Saturday before work I roasted some of the pretty little organic tomatoes with some asparagus I had in the fridge, and drizzled them with some balsamic vinegar. It was a great little salad. I didn't take a picture though, and since I think posting a recipe without a picture is pointless, i'll leave it at that.

Photobucket

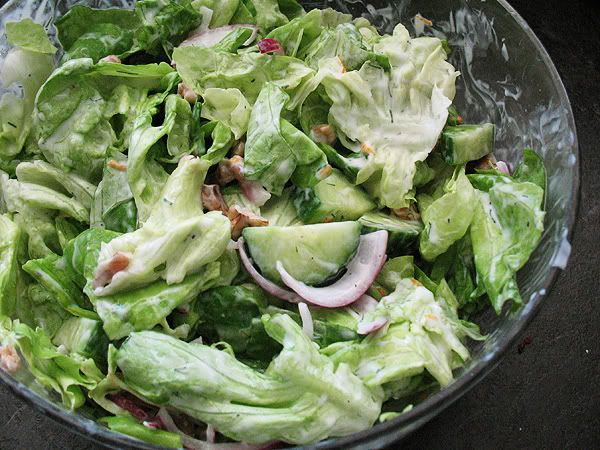
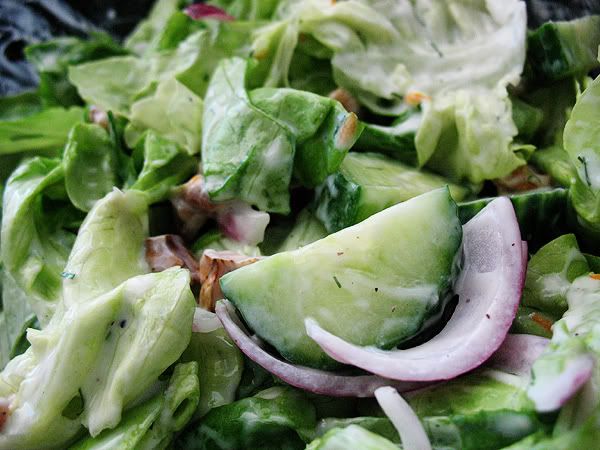
What I did make sure to take a picture of, was the resulting salad that came from the head of butter leaf lettuce. I had only had butter leaf lettuce once before, at a cafe where it was served with an amazing orange dressing. The flavors went so beautifully together that I knew i'd need to re-create a similar taste for this lettuce. So I went off of a recipe I recieved from a co-worker, adding some newer flavors I thought might be nice. The result was wonderful. It had creamy ingredients but still tasted light. The only change I might make is to add some dijon mustard to the next dressing, or perhaps a bit more vinegar, just to get a bit more bite out of them.

Photobucket

I'm calling this "Hope of Spring Salad" because even though there is snow all over, and the temperature is still below 0 (celcius) everyday, this salad helped me to believe spring might, at some point happen.

Ingridients:
1 head butter leaf lettuce (other lettuces will work)
1/2 red onion, thinly sliced
1/2 cup chopped walnuts
1 cucumber, sliced in half circles

dressing:
2 tbs light sour cream
2 tbs light miracle whip
1/4 cup white vinegar
juice of 1/2 an orange
zest of one orange
1 tbs dill
pinch of salt and pepper

Wash and tear the lettuce leaves and thinly slice the onions. Mix with the walnuts and set aside.
In a small bowl, mix all dressing ingredients together with a whisk. Incorporate to the salad and serve right away.
(serves around 4 as a side salad.)

Monday, March 10, 2008

It's tofu...It's magic!

So much for my last post...it's been almost a month and i've hardly blogged! I was kind of in a cooking rut I guess...so...moving on.

Yesterday was one of those desperate food days. I was away on vacation for the past week, and when I got home I saw how very apparent it is that I am the only one in my family that buys real food! I came home to a near empty fridge, filled with only milk, leftovers, and a few condiments. And since I hadn't had a chance for a decent shopping trip yet, my only lunch option was macaroni and cheese. But I wanted something more. I wanted to make something, as I hadn't been able to cook for the past week. I'll talk more about my culinary adventures from my trip later, but right now the magic tofu will take center flog:

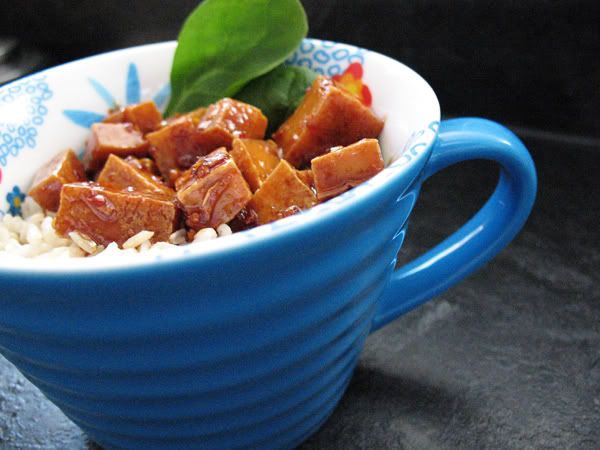
Photobucket

I found this recipe for Tofu "Magic" a while ago at Eat Me, Delicous and while it sounded great, It didn't really move me to make it right away. But as I previously mentioned, there is little to no food in my house. So I started with a base food, brown rice. I put on a pot and then went online to frantically search for something to go with it. As I came across some archived recipes, I found the one for tofu magic. I then got really excited when I remembered that there just might be a block of tofu in the fridge.
As it turns out, I didn't have any tofu. I actually didn't have any ingredients needed for the magic tofu. But my mind, my heart, and my stomach would take nothing but this recipe. So as the rice finished cooking I walked over to the grocery store and bought what was needed. It was a warm day, and fate seemed to be on my side just this once.


So thank you, fate. For bringing me to this recipe. It really is magic! For as long as i've been a vegetarian i've strived and searched for the perfect tofu. Crispy, yet tender...flavorful but not overpowering... this tofu is fits the bill!
I think the trick to is perfection is the frying of the tofu intially, then making more of a reduction then a sauce with only a few ingredients. It was such a quick and easy recipe to make to!
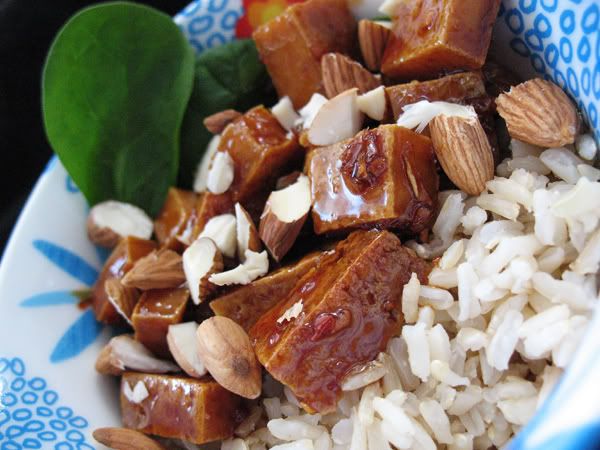
I chose to serve it with brown rice (as mentioned) and baby spinach. While there are a few leaves poking out of the mug (yes, I eat out of mugs!) there was also a little bundle under the rice. The heat from the rice and tofu wilted that spinach right up, and the mix was marvelous.

Photobucket

As a I went to retrieve this recipe again to post, I noticed that the recipe itself isn't called Tofu Magic, but "Matthew's Delicous Tofu". No matter what it is called, it is amazing and all should try it out!

Matthew's Delicious Tofu
Thanks toEat Me, Delicous, via The Garden of Vegan

2-3 servings (with rice)

1 lb medium firm tofu, chopped
2 tbsp olive oil
3 cloves garlic, minced
1 tbsp fresh ginger, grated
1/4 tsp dried chili, or 1 tsp Asian chili sauce
1/8 cup maple syrup
1/8 cup Braggs or soy sauce
1 tsp lemon juice
1/4 cup dry roasted almonds, chopped (garnish)

In a medium saucepan on medium-high heat, saute the tofu in oil until browned. Reduce heat to medium-low and add the garlic, ginger, and chili. Saute for 5 minutes. Add the maple syrup, Braggs (or soy sauce), and lemon juice. Cover and cook until the liquid has evaporated. Garnish with almonds.

Tuesday, February 12, 2008

I've been a bad blogger...

First I'm going to start of by saying what a bad blogger I have been. For a while I was in a cooking rut, not really making anything worthy of a post here. That was my excuse to not fill this flog with food. But that rut was quite short lived, for lately I have been making some pretty awesome things. I've managed perfect crepes, a roasted veggie and cous cous salad, a spicy tofu soup, pan-fried oatmeal, and many others! Now I am just relying on terrible excuses to not post. Things like "Well I can't take a picture, because my family is here." (They know I have a food blog, but I still get weird looks whenever I choose to photograph food. It brings on too many questions.) Another reason is that my kitchen is upstairs, while by bedroom in the basement. My camera is always kept in my room. And as much as I hate to admit it, most of the time I am too hungry/lazy to take a trip down the stairs to grab my camera. Also there is the procrastionation factor. "I'll post about it later..." and then later never comes. I made a Yule Log for christmas that I still haven't bothered to post about! (But I really don't think I will now...It seems a little too late for that. A mention is all the Yule Log will get.)

I'm ready for all of these pathetic excuses to come to an end. I promise to be a better blogger. I've even signed up for some blogging events, which i'm hoping will motivate me to get more active in this blog. (And maybe get me some visitors so that I don't feel like I'm blogging to myself...)

And now, onto the food.


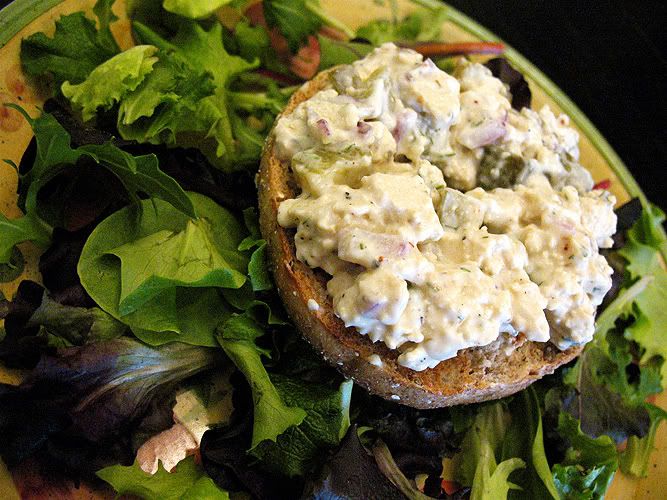
Photobucket

Today I tried out a tofu salad recipe I found from Everybody Likes Sandwiches. I found it a while ago, and have been meaning to try it. Today finally seemed the right time since the only food I had in my kitchen happened to go in this recipe!


Tofu Salad
(from Everybody Likes Sandwiches)
1/2 cup mayo or soynaise (I used light miracle whip)
1 Tbsp yellow mustard (I used dijion)
1 block of firm tofu, crumbled
1 tsp capers
2 Tbsp chopped pickles
2 Tbsp finely diced onions
juice & zest of 1/2 lemon
pepper
(these next three ingredients were from the original post, but I didn't have them and so I substituted them for the following ingredients. )
1/2 tsp garlic powder
1 tsp curry paste (or powder)
1 tsp honey (optional)

2 tsp garlic seasoning
1 tsp chili powder
2 tsp dill

In a medium sized bowl, mix together the mayo and mustard. Add in the crumbled tofu and combine well. Stir in the rest of the ingredients, mixing well after each addition. Let mixture sit for half an hour to let flavours develop. Spread on toasted bread.


I'm really happy with how this salad came out. I can see myself packing this in my lunch quite often from now on.

Monday, January 14, 2008

Light Macaroni Salad

The inspiration for the following recipe came from two sources. The first, being a cooking show on PBS. (A cooking show on PBS? Who'da thunk it?) And the second, from my desire to be the biggest possible sponge on my parents whilst I can, by bringing my lunches to work instead of going to booster juice and spending $10 a day of my own money.

Now more on the PBS show. It was a lazy saturday morning and I was in the basement watching tv. My father came downstairs and stole the remote from me. He flipped channels until landing on PBS, which was airing a cooking show. Since I am obsessed with food, I tolerated this. The hosts were just about to embark on a macaroni salad. And though i've never really liked macaroni salad all that much, the recipe inspired me. Over a week went by and I couldn't get the macaroni salad off my mind. I'm not sure of why that is, but I am glad for my fascination, because this salad came out great.

I think the reason it got to me was that the host added the spices before adding the mayo. She claimed that it was more important to flavor the pasta, then flavor the sauce. It seems like such a simple idea, but I had never seen anything like it before.

So I took that nugget of knowledge with me as I finally embarked on making this salad. Though as I stated, I've never felt that much love for a macaroni salad. This one was different though. I just knew it.

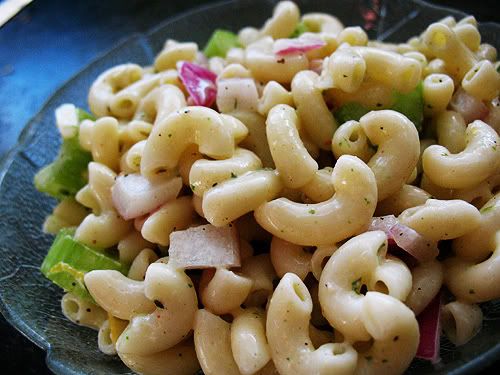
And was I right! This tasted so much lighter and fresher then most macaroni salads. Unlike the traditional macaroni salad, these little noodles were not swimming in mayo, just slightly tossed in it.

So here is my modified recipe of macaroni salad. I adjusted it a bit, adding a few more flavors and a lot more lemon. Hence the name of this recipe. I also used miracle whip instead of mayo. Since I prefer it in my sandwiches, I thought "why not in my salad as well?" I'd also like to point out how ridiculously easy this salad is to make!

Photobucket

Light and Lemony Macaroni Salad

1/2 box of Macaroni, cooked al dente and cooled
2-3 Stalks of Celery, chopped
1/2 red onion, chopped
1 clove of garlic, finely chopped
1 lemon, juiced plus zest
2 cubes frozen parsley (this was all I had, if you are using fresh then i'd go with a few tablespoons, then adding more to taste if needed.)
1 tsp chili powder
dash of salt and pepper
1/2 cup of miracle whip, or mayonaise.


Cook and drain the macaroni. Rinse with cold water, and transfer to a large bowl. Add chopped celery, onion, garlic, lemon zest, parsley, chili powder, and salt and pepper. Let sit in the fridge for about half an hour. Take the pasta out and toss it with the miracle whip and lemon juice.


I really loved this salad. It was easy, light, and so flavorful. I know it will be one I will fall back on in the future for lunches. My wallet is quite pleased because of this.

Wednesday, January 9, 2008

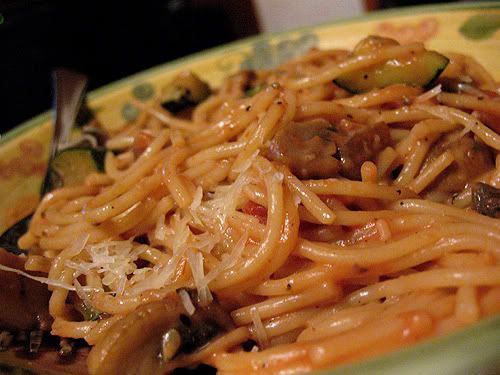
Mushroom Tomato Cream Pasta

Tonight was one of those nights where I got home late, and after not having dinner at a decent time was forced to rummage through the kitchen to find something quick and edible. Sometimes, when I am lucky, this kind of night has much more pay-off then pain. As was tonight.

So I got home and tried to figure out what to make for dinner. My sister had already eaten, and my mom opted for left over pizza. My dad decided to wait it out and said he would eat whatever I put in front of him. While I considered serving him dog food just to see what would be come of it, I instead decided to create something. So I set to work.

As always, our pantry was stocked with pasta. Then I totally lucked out when I found half a bag of mushrooms and a zucchini in my fridge. Plus, I even had sauce in there! Once I came upon these staples I had settled with the idea to add the veggies to some pasta with some plain ol' tomato sauce. Nothing too crazy, but it would serve it's purpose.

So I was about halfway through making dinner, when I realized there was much less pasta sauce in the jar then I had anticipated. Hardly enough to cover the pasta. Since my vegetables were near done their sauteing I had to act quick. I scoured our lazy susan for some canned tomatoes, tomato paste, anything sauce like. It was then I found the perfect addition. A can of mushroom soup! It would be the perfect addition to bulk up the sauce!

So that is how this dish came to be. Keep in mind that since this recipe was made on the spot, the measurements may not be exact. But this is the type of dish where it really won't matter. Also keep in mind that the quantities can easily be changed to feed more or less hungry mouths.

Photobucket

Mushroom Tomato Cream Pasta
Yields 2-3 servings.


1/4 box of pasta (I used Smart Spahgetti.)
1/2 can low fat mushroom soup
1/4 cup of water
1/3 cup of tomato pasta sauce (I used Healthy Choice Garlic Lovers)
1-2 cups of mushrooms, chopped
1 small zucchini, chopped
1 tbsp of oil
freshly ground black pepper (to taste)
parmesan cheese (to garnish, optional)

Start a pot of water boiling for the pasta. Once the water is boiling, add the pasta and cook according to package directions. Meanwhile, clean and chop the veggies. Heat 1 tbsp of oil in a medium frying pan. Add veggies once pan is hot and coat with freshly ground black pepper. A few teaspoons would be a good place to start. I really love my pepper though, so I added a few generous tablespoons to the veggies. Once the veggies have cooked down, add half the can of mushroom soup, and the water. Mix well so that the consistency is nice and smooth. Once your pasta is done, add the veggies and mushroom sauce, as well as the tomato sauce. Garnish with some parmesan, Mix well to coat, and serve!

This dish came out great. It was hearty and filling and tasted amazing. I know it will be one dinner that I see myself coming back to time and time again. Although next time I think I will add some garlic and maybe some parsley to the veggies.